ODROID @ KES

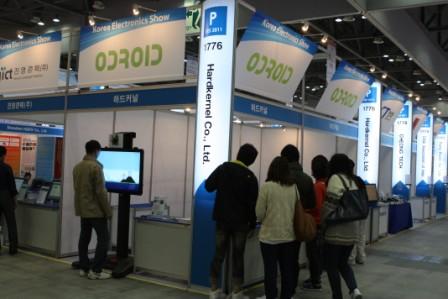
KES (Korea Electronic Show) has started yesterday. We have revealed our new products.

Our booth #1776


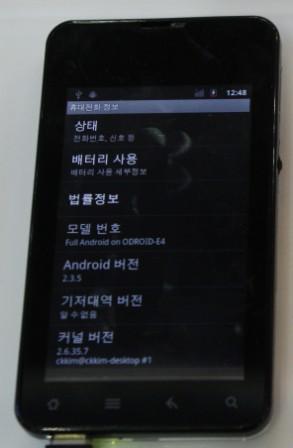
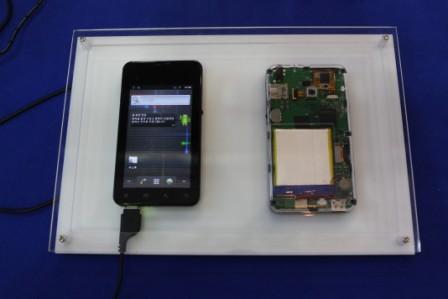
ODROID-E4
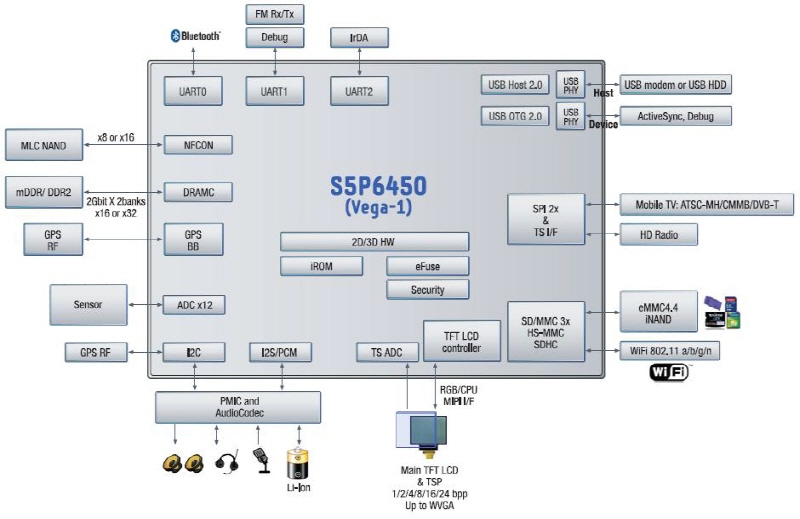
– ARM11 800MHz S5P6450
– 4inch multi touch Display
– Android / WinCE
– Available in November 


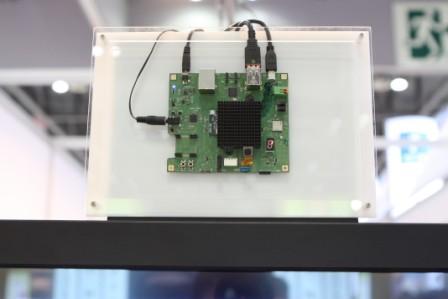
ODROID-PC
– ARM Cortex-A9 Dual Core Exynos4210
– 10/100 Mbps Ethernet
– 4Port USB Host
– Available in November 


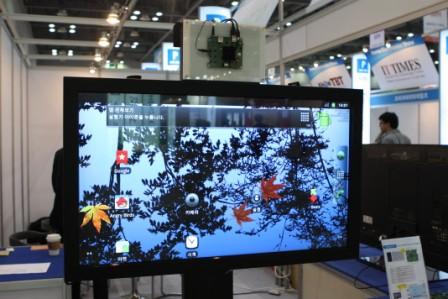
AD Pannel using ODROID-PC
42inch IR type Multi Touch


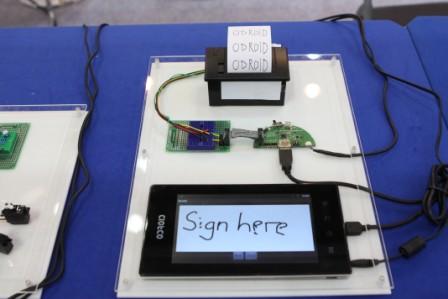
ODROID-ADK
Added a Printer


There will be official update of our new products soon~~~

800Mhz ARM11 with Mali-400 GPU ===> S5P6450

Samsung’s latest application processor S5P6450(VEGA) for mid-range embedded market is based on 800Mhz ARM11 with Mali-400 3D GPU.

The key features of S5P6450 include:
– ARM1176JZF-S based CPU system with Java acceleration and Memory Mapping Unit (MMU) capability.
– 16KB I-cache and16KB D-cache CPU memories.
– 64-/32-bit 166MHz AMBA 3.0 AXI bus structure.
– Supports 32-bit Mobile DDR Interface Mobile DDR and DDR2.
– Embedded 64kByte SRAM and 64kByte ROM on AXI.
– Supports 8-bit 5 Megapixel (MP) capable Camera Interface
– Supports 24-bit 3x I2S and 16-bit 3x Pulse Code Modulation (PCM) Interface
– Supports 6x UART/2x SPI/2x I2C interface
– On-chip USB 2.0 OTG controller and PHY transceiver supporting high speed
– Supports USB HOST 2.0
– Supports Hardware Rotator
– Supports Transport Stream Interface
– Supports GPS baseband
– Supports Security SubSystem (SSS)
– Supports Mali400 3D engine
– Supports 13-ch. Touch screen Analog-Digital converter (TSADC)
– Supports MPEG2/4 decoder
– Supports eMMC 4.4
– Manufactured with the 45nm process for low power and low cost.
– Package is 409 pin FBGA type and dimension is 14.0 x 14.0 mm with 0.65mm pitch.

Many S3C2440 based application will meet a problem due to EOL(end of life) of SDRAM.
Samsung will not produce any SDRAM from middle of 2012.
So, you would better prepare your product with S5P6450/DDR solution for your future.
Please note the over all system cost will be very similar to S3C2440.
I’ll post this issue in detail within couple of weeks.

Thanks,
-Justin-

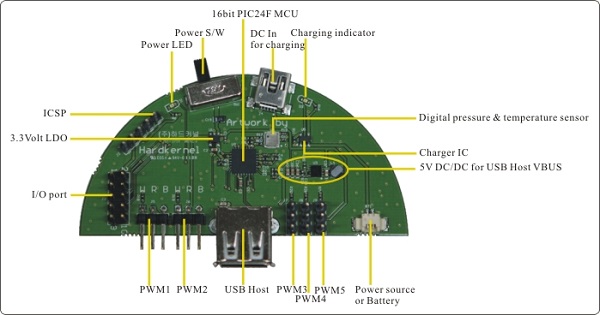
BaB Board @半脊雪山 in China

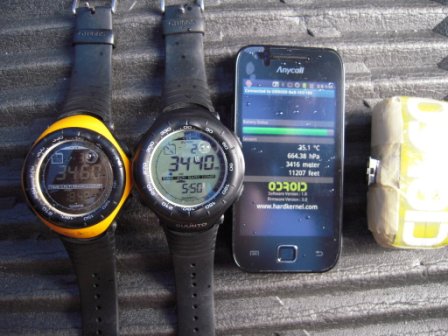
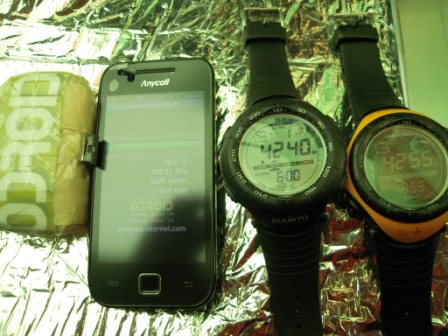
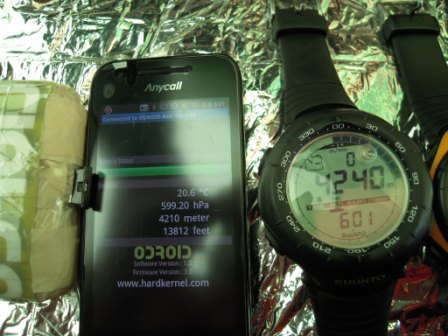
Thanks to University of Incheon Alpine Club for the evidence shot. The picture was taken at the mountain 半脊雪山 in China.

@ Base Camp : around 3400m height, 25.1 degree

@2nd Camp : around 4240 height, 20.6 degree


ODROID BaB Board has digital pressure and temperature sensor and it is connected to Gallexy S through bluetooth connectivity. The temperature is 25 degree at the height of 3400meter.


Android Open Accessory Kits

It’s been a long story that we launch Android Open Accessory Kits.

April Project lauch.
Project name : Android open accessory Kit-Robot
Target launching : Early July
May Robot design and tooling has started
Made first evaluation sample
Google suddenly announced ADK at Google IO. What???
June Add the ADK version and delay the launching schedule 
July Final board ready, tooling finished, firmware debugging
Launching 
August First customer shipping

Android accessory kit has turned out to be two different models. One is Bluetooth communication. The other is USB communication. The hardware is exactly same except the Bluetooth module. But the firmware is different and not exchangeable. Users need to choose which one is suitable for them. If you still want to change or write your own firmware, you must have a download tool such as a Microchip’s PicKit-3/2.

ODROID-BaB Robot Kit : Bluetooth Accessory Board Robot Kit

Android API is open. So users can have their own app to controll the robot. One example is controlling the robot with google voice recognition API. If your phone has the Bluetooth feature, you are ready to enjoy this great accessory development regardless of Android version.

ODROID-ADK
Controlling hardware with the Android smartphone application is another challenge for developers.
We’ve test our ODROID-A, ODROID-7, Samsung Galaxy-S and Galaxy-S2 Gingerbread 2.3.4 update. But only the Galaxy-S2 doesn’t work with ADK open accessory library. We don’t know why !!

Hardkernel Summer Workshop

We have workshop on Thursday(21st) and Friday(22nd). Please understand whether we do not answer the phone and not reply the mail.

[Korean] 저희가 목요일과 금요일 워크샵을 갑니다. 전화를 받지 않고 메일에 회신을 못해 드리더라도 이해해 주십시오. 

Open Accessory Library test on ODROID-7

Open Accessory is a new capability for integrating connected peripherals with applications running on the platform. The capability is based on a USB (Universal Serial Bus) stack built into the platform and an API exposed to applications. Peripherals that attach to Android-powered devices as accessories connect as USB hosts.
This was introduced with Android 3.1 Honeycomb and it is back ported in to Android 2.3.4 Gingerbread.

You can find more information about ADK in this link.
http://developer.android.com/guide/topics/usb/adk.html

Hardkernel recently ported the latest Gingerbread 2.3.4 to ODROID-7 and we’ve tested the ADK feature with PIC24F based simple board.
Enjoy this video and keep in touch~   We will make a new release for ODROID-7 and ODROID-A soon with this great Open Accessory Library.

Ubuntu 11.04 Natty on ODROID-A

We posted Ubuntu 10.10 installation guide couple of weeks ago.
We have tried Ubuntu 11.04.

I followed below steps to install the Ubuntu 11.04 on ODROID-A.

0. You may need below items to install Ubuntu.
– Odroid-A
– Micro-SD USB card reader
– USB Serial port with debug board for low level debugging.
– USB hub with external power supply
– USB-to-Ethernet (with AX8817X chipset)
– USB keyboard
– USB mouse

1. Install rootstock on your host Linux (Must be upgraded to 11.04 first)

2. Make a minimal root file system of Ubuntu with below command.

$sudo rootstock --fqdn odroid --imagesize 4G --dist natty --serial ttyO2 --login odroid --password odroid --seed wget,nano,linux-firmware,wireless-tools,usbutils,btrfs-tools,i2c-tools,wpasupplicant \"main universe multiverse\" --kernel-image http://rcn-ee.net/deb/natty/v2.6.38.4-x3/linux-image-2.6.38.4-x3_1.0natty_armel.deb

After rootstock process, you will have a compressed tar ball which contains Ubuntu 11.04 root file system.
Note, the ID is ‘odroid’ and passwd is ‘odroid’

3. Make partition and format the Micro-SD as below.

Disk /dev/sdc: 8270 MB, 8270118912 bytes
255 heads, 62 sectors/track, 1021 cylinders
Units = cylinders of 15810 * 512 = 8094720 bytes
Sector size (logical/physical): 512 bytes / 512 bytes
I/O size (minimum/optimal): 512 bytes / 512 bytes
Disk identifier: 0x00000000
Device Boot    Start    End    Blocks   Id     System
/dev/sdc1        800      1021   1754910   b     W95 FAT32
/dev/sdc2        4        799    6292380   83    Linux

4. Uncompress the root file system into the EXT4 partition with “sudo”

5. Plug the Micro-SD card into Odroid-A and enter in u-boot command line.
# setenv bootargs root=/dev/mmcblk0p1 rw rootfstype=ext4 init=/sbin/init console=ttySAC1,115200
# movi read kernel 40008000; bootm 40008000
# saveenv
* Please note that the latest(27-May version) u-boot can support ‘saveenv’ command.

6. After booting, I set-up internet connection with USB-ethernet to install Ubuntu-Desktop.
sudo ifconfig eth0 [your static ip_address] up
sudo route add default gw [your gateway_ip_address] dev eth0

7. Install GUI of Ubuntu. (This may take several hours !!!)
sudo apt-get update
sudo apt-get install ubuntu-desktop

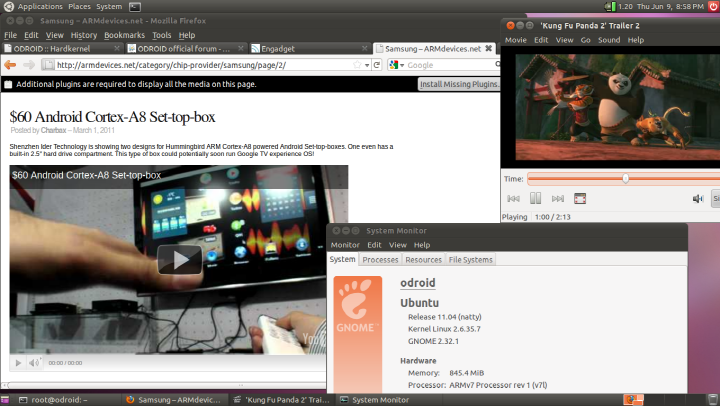
8. Reboot and enjoy. This is a screen shot of my Odroid-A.
http://dev.odroid.com/wiki/odroida/pds/FrontPage/Screenshot11.png<<== Click this to show full size image.
9. Activate WiFi connection.

$ sudo mkdir -p /system/etc/firmware
==> copy fw_bcm4329.bin, nvram files into /system/etc/firmware directory.

$ sudo mkdir /lib/modules/2.6.35.7/kernel/lib
==> copy bcm4329.ko file into /lib/modules/2.6.35.7/kernel/lib/ directory.

$ sudo vi /lib/modules/2.6.35.7/modules.dep
----------------------------------------
kernel/lib/bcm4329.ko: <--- Add this line and save.
----------------------------------------

$ sudo vi /etc/modules
----------------------------------------
bcm4329 <--- Add this line and save.
----------------------------------------

$ sudo vi /etc/network/interfaces
----------------------------------------
auto lo
iface lo inet loopback
auto eth0
iface eth0 inet dhcp
address 192.168.0.204 <--- AP IP ADDRESS(static)
gateway 192.168.0.1
dns-nameserver 192.168.0.1
netmask 255.255.255.0
wpa-driver wext
wpa-ssid hardkernel2 <--- Your SSID
wpa-ap-scan 2
wpa-proto RSN
wpa-pairwise CCMP
wpa-group CCMP
wpa-key-mgmt WPA-PSK
wpa-psk 81b2ae31a8dede0e05e446fbf6a243c71f865909c349bba1ecdca996e5e0417e <--- your WPA hex_key
----------------------------------------

How to make a WPA-PSK key.
$ wpa_passphrase <your_essid><your_ascii_key>

network={
ssid=\"test\"
#psk=\"12345678\"
psk=fe727aa8b64ac9b3f54c72432da14faed933ea511ecab1 5bbc6c52e7522f709a <--- Copy this to wpa-psk !
}

10. Status…
This is a trial build and test. There should be many known/unknown issues.
LCD, WiFi, Audio, Keyboard, Mouse, USB-ethernet and Dual-Core are working well.
Touch-screen, Bluetooth, sensors and 3G modem are not working.

Mali-400 based 2D/3D accelerated x-server driver(X11 Display Drivers) can be delivered from ARM.
Refer this link for further steps.
http://www.malideveloper.com/developer-resources/drivers/index.php
Ubuntu 10.10 on ODROID-A

I’ve just installed Ubuntu on ODROID-A.

I followed below steps to install the Ubuntu.

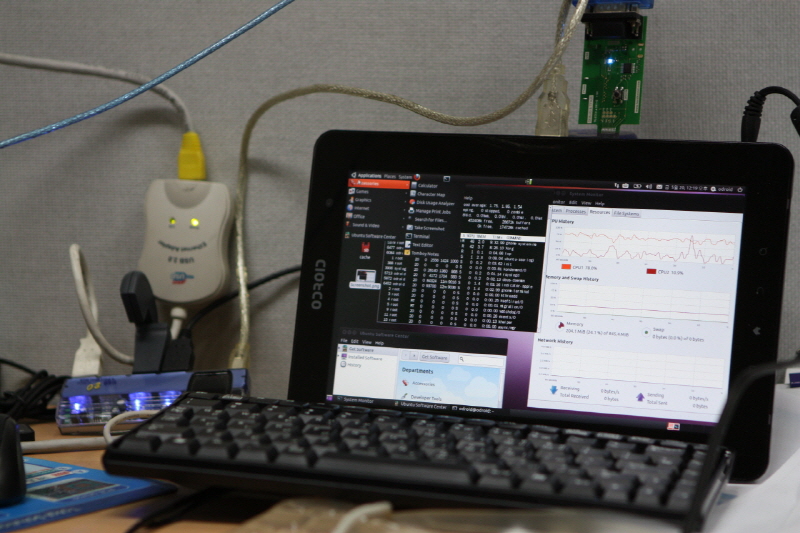
0. You may need below items to install Ubuntu. Refer the picture !
– Odroid-A
– Micro-SD USB card reader
– USB Serial port with debug board for low level debugging.
– USB hub with external power supply
– USB-to-Ethernet (with AX8817X chipset)
– USB keyboard
– USB mouse

1. Install rootstock on you host Linux

2. Make a minimal root file system of Ubuntu with below command.

sudo rootstock sudo rootstock --fqdn odroid --login odroid --password odroid --imagesize 4G
-seed wget,nano,linux-firmware,wireless-tools,usbutils --dist maverick --serial SACttyO2
--components \"main universe multiverse\"
After rootstock process, you will have a compressed tar ball which contains Ubuntu root file system.
Note, the ID is ‘odroid’ and passwd is ‘odroid’

3. Format the first partition of Micro-SD with EXT4.
It was used for user data storage for Android.

4. Uncompress the root file system into the EXT4 partition with “sudo”

5. Plug the Micro-SD card into Odroid-A and enter in u-boot command line.
setenv bootargs root=/dev/mmcblk0p1 rw rootfstype=ext4 init=/sbin/init console=ttySAC1,115200
movi read kernel 40008000; bootm 40008000
* Please note current u-boot has a bug. ‘saveenv’ command is not working yet.
We will fix it soon.

6. After booting, I set-up internet connection with USB-ethernet to install Ubuntu-Desktop.
sudo ifconfig eth0 [your static ip_address] up
sudo route add default gw [your gateway_ip_address] dev eth0

7. Install GUI of Ubuntu. (This may take several hours !!!)
sudo apt-get update
sudo apt-get install ubuntu-desktop

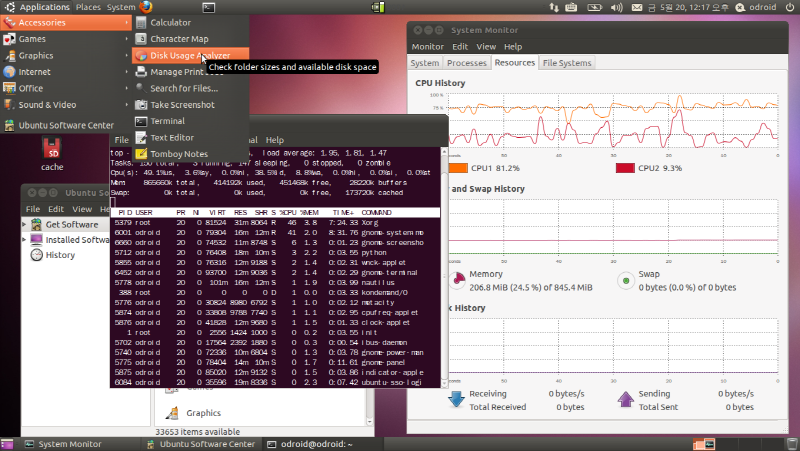
8. Reboot and enjoy. This is a screen shot of my Odroid-A.
Look at the system monitor which shows Dual-core interaction.
http://dev.odroid.com/wiki/odroida/pds/FrontPage/Screenshot.png <<== Click this to show full size image.

9. Status…
This is a trial build and test. There should be many known/unknown issues.
LCD, Audio, Keyboard, Mouse, USB-ethernet and Dual-Core are working well.
Touch-screen, WiFi, Bluetooth, sensors and 3G modem are not working.
Ubuntu version is 10.10 and should be updated to 11.04.
There are many “To do” items.
Mali-400 based 2D/3D accelerated x-server driver will be delivered from ARM or Samsung S.LSI in the future.